Guide.
Everything you need to record your first video podcast with PodcastPilot – from setting up sources to importing the session in your NLE. Written for engineers and hosts alike.
1. Getting started.
PodcastPilot runs on macOS 14 or later and is optimized for Apple Silicon.
Before your first recording
- Blackmagic DeckLink (SDI/HDMI cameras): Install Desktop Video version 16.0 or later. The app shows a clear message if the driver is too old.
- NDI® sources (cameras and software over the network): Works out of the box when the NDI runtime is installed (bundled with the app or via NDI Tools).
- Audio interfaces: Every Core Audio interface works without setup – plug in, and the devices appear in the tracks' input menus.
- Disk: Record to a fast SSD. The app measures the disk's write speed itself and warns if it can't sustain the chosen quality.
2. The window at a glance.
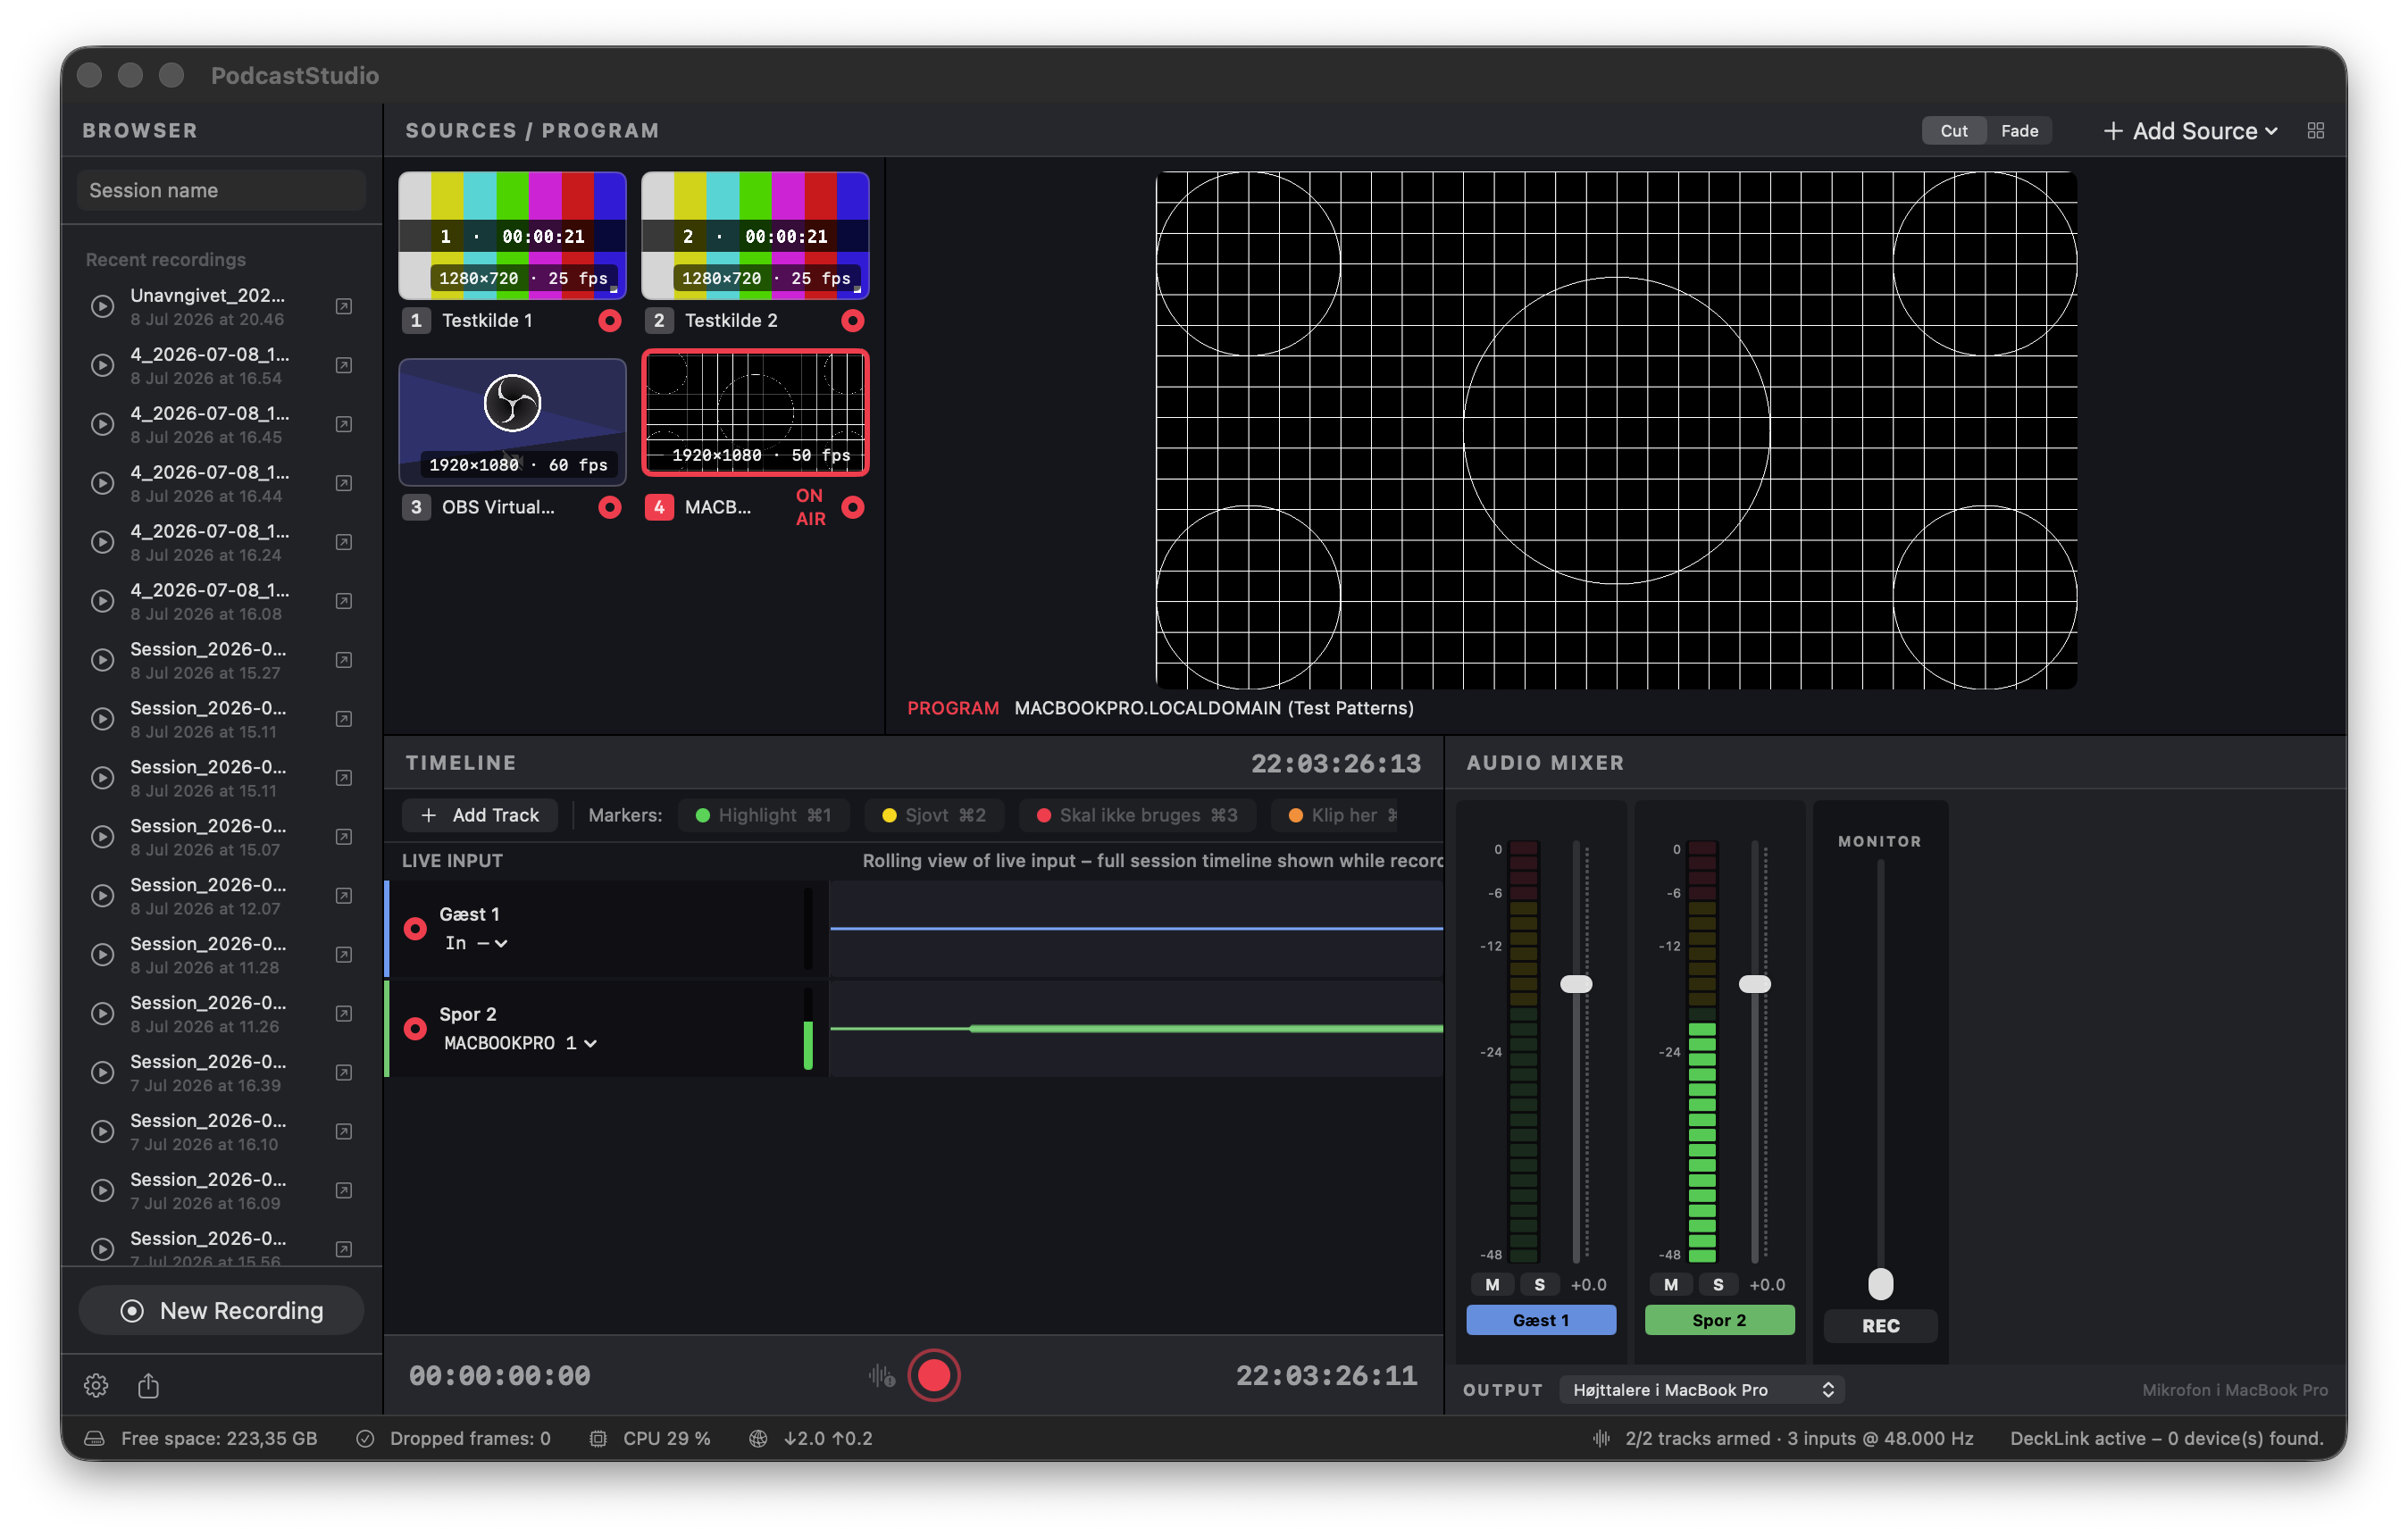
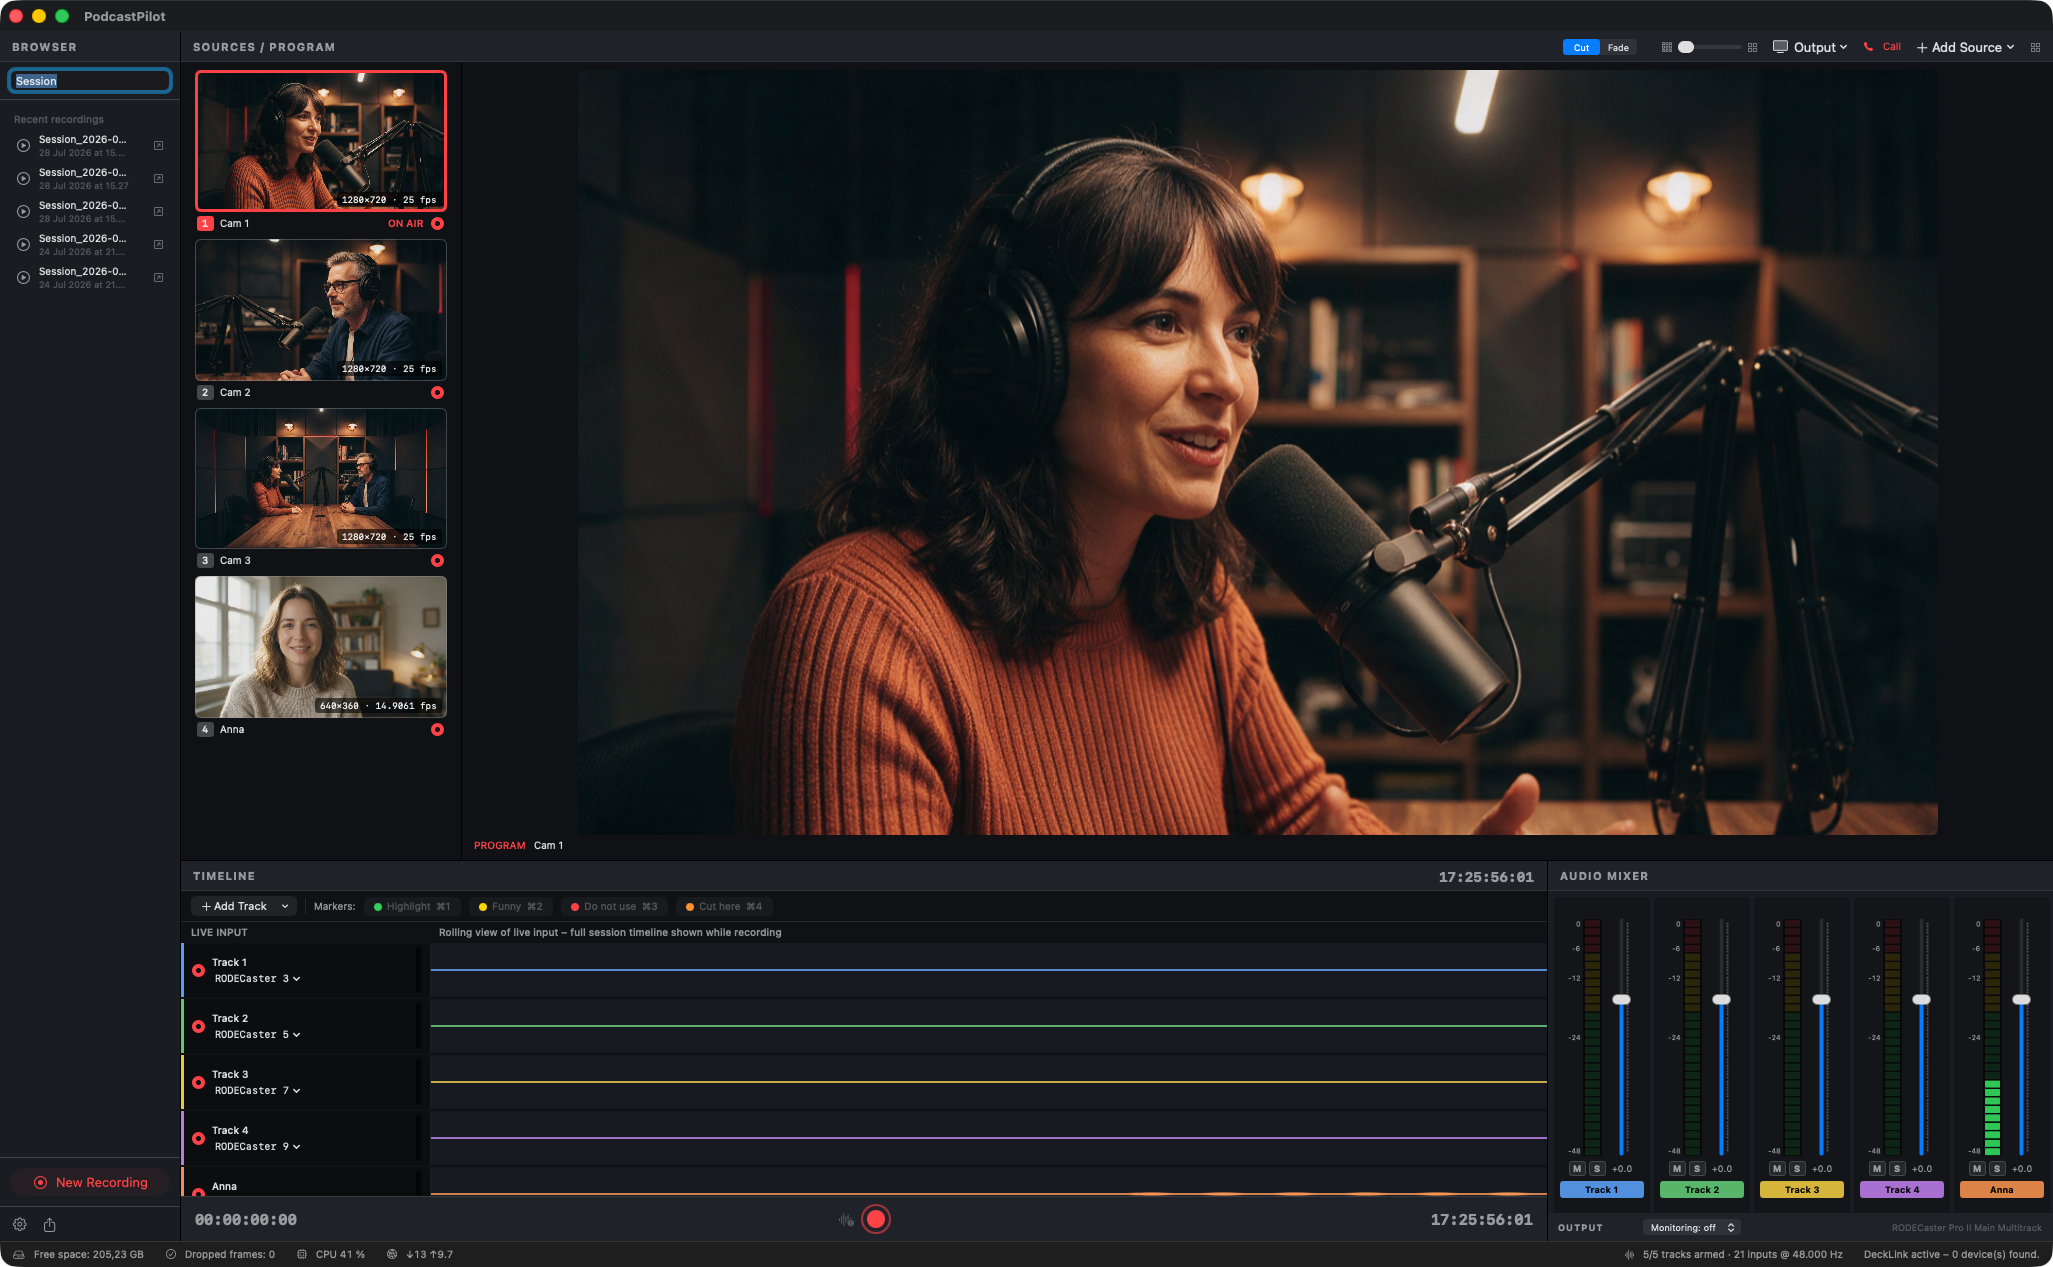
Everything lives in one window with three areas – no hidden panels or extra windows.
 1234567
- 1BROWSER – session name, recent recordings (play/open/export) and the New Recording button.
- 2SOURCES – every video source with a live preview. Click a source to cut it on air.
- 3PROGRAM – the switched signal, recorded into the program file. Red border while recording.
- 4TIMELINE – audio tracks with live waveforms; while recording the full session is shown with markers.
- 5AUDIO MIXER – logarithmic dB meters, faders, mute/solo and monitoring.
- 6Transport – elapsed timecode, sync slate, REC button and time-of-day timecode.
- 7Status bar – disk space, dropped frames, CPU, network, audio and DeckLink status. Always visible.
3. Video sources.
Add sources with the Add Source menu in the top right: DeckLink inputs (SDI/HDMI), NDI sources from the network, USB/Continuity cameras and test patterns.
 1234
1234
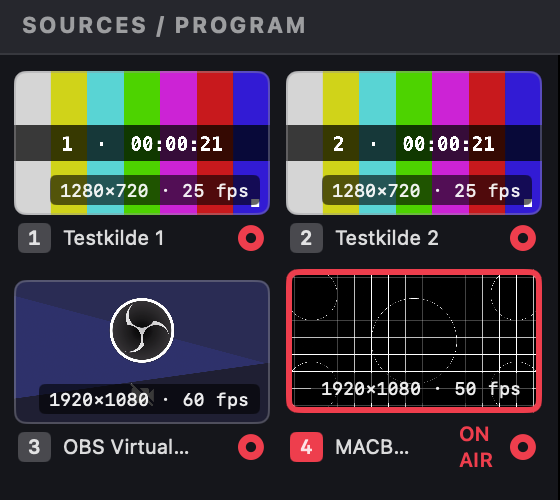
- 1Shortcut number – cut to the source with keys 1-4.
- 2Format info – the source's detected resolution and frame rate, right on the picture.
- 3Arm button – red = the source gets its own ISO file while recording. Unarmed sources can still be switched.
- 4ON AIR – the source is in program right now (red border on the preview).
Right-click a source
- Move Up/Down – changes the order (and thereby the shortcut keys and the Cam numbers in the recorded files), so input 1 can always be camera 1.
- Rename… – give the source your own name (Host, Guest 1, Wide). The name is remembered per physical source and used everywhere: in the UI, in the recorded ISO file names, on the no-signal frame and in Stream Deck variables.
- Remove Source – removes the source from the setup.
If a source loses its signal it shows color bars with "NO SIGNAL" and the source name – the same generated frame on every path (preview, program, recording and outputs), so nothing downstream ever sees black. DeckLink inputs and their order are remembered for next time, and NDI sources on the network are discovered automatically and sit ready in the menu.
4. Program and switching.
The program viewer shows what your viewers get: the switched signal, simultaneously recorded into the program file with a reference audio mix.
 12345
12345
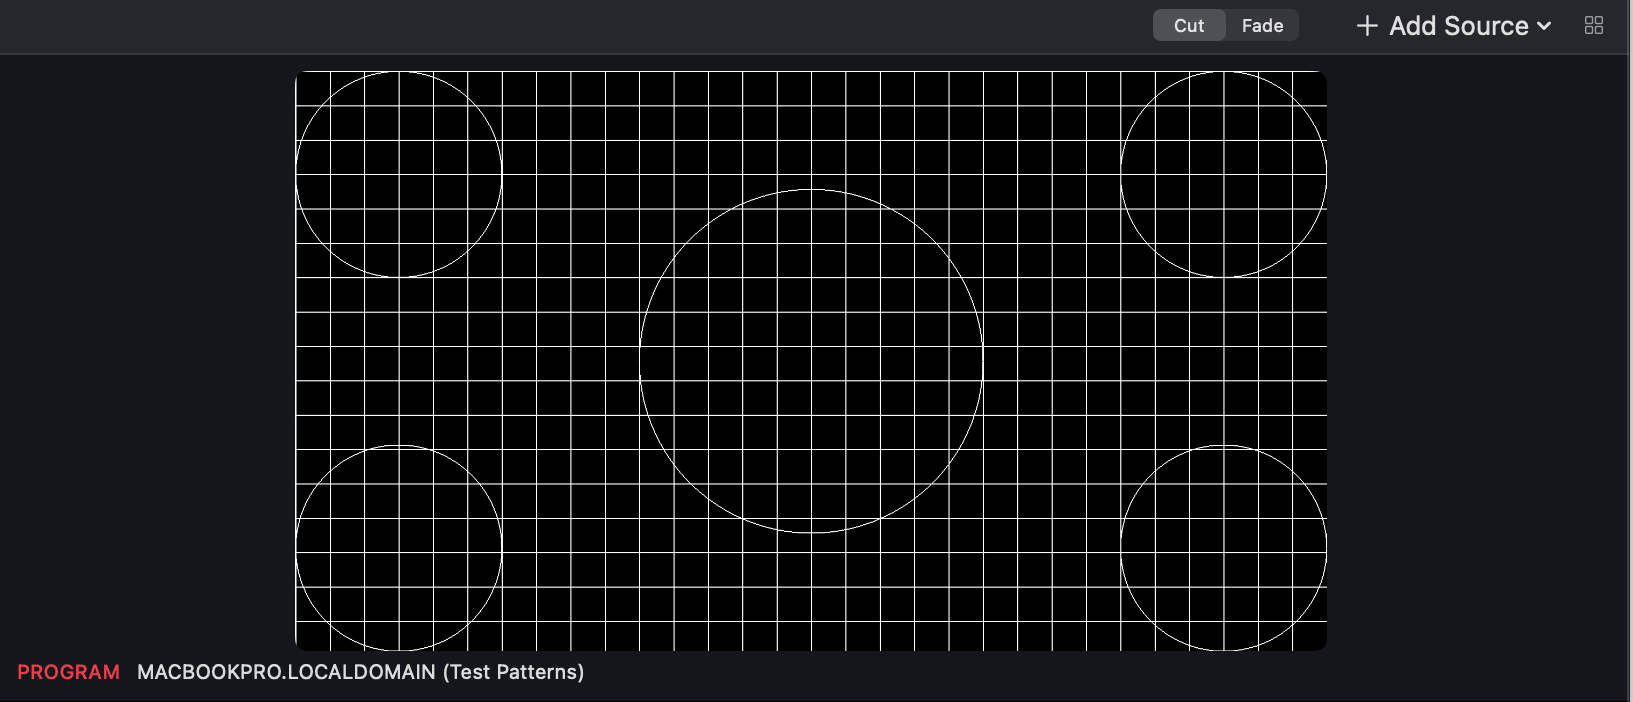
- 1Cut / Fade – choose between a hard cut and a cross-fade (duration adjustable in Settings → Sources).
- 2Preview size – slider that scales the source previews — the grid adapts and your choice is remembered.
- 3Add Source – DeckLink inputs, NDI sources, cameras and test patterns.
- 4Multiviewer – large source grid for control-room use (shortcut: V).
- 5PROGRAM label – shows which source is on air right now.
Lay out the switcher your way: drag the divider between the previews and the program viewer, and adjust the preview size with the slider in the header.
Cut by clicking a source or pressing 1-4. Every cut is logged with its timestamp in the session manifest, so in post you can see exactly what was on air when.
5. Video outputs: screen, NDI and SDI.
The program and any source can be routed out of the app live: to a studio monitor, to the network as NDI, or to SDI via DeckLink.
Open the Output menu in the header, next to the cut/fade selector. Every destination gets its own assignment: Off, Program or a specific source. The icon is filled while an output is active.
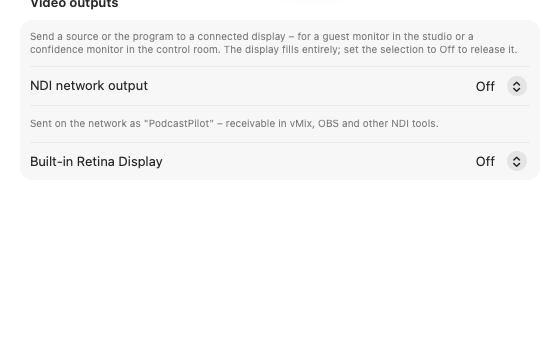
Screen output
Sends program or a source as a full-screen monitor on a chosen display: a confidence monitor or TV on the Mac's HDMI or USB-C output. The assignment is remembered per display name, so the monitor comes back by itself when the screen is reconnected.
NDI output
Sends program or a source to the network as an NDI sender, scaled to the recording resolution and frame rate, so other machines (vMix, OBS, another PodcastPilot) can pick it up like any NDI source.
DeckLink playout (SDI)
SDI out through DeckLink output connectors, for the studio's monitor wall or downstream equipment. Cards with configurable connectors (Duo 2 and the like) work alongside inputs; a connector occupied by an input shows as "In use" and cannot be selected.
6. Audio tracks and timeline.
Audio tracks work like in a DAW: create a track, pick an input, arm it – and the track records as its own clean 24-bit Broadcast Wave file.
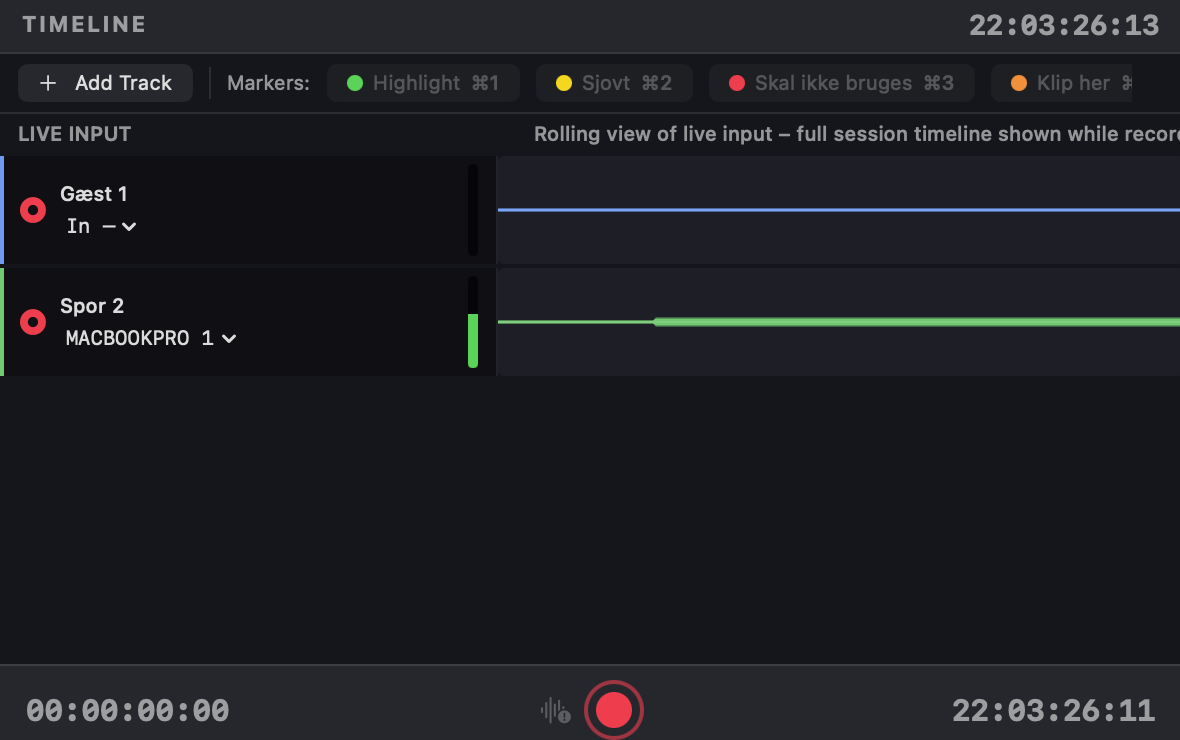 123456789
- 1Add Track – create a new audio track — mono, or stereo for adjacent channel pairs like a mixer's sub-mixes (RØDECaster and the like). Stereo tracks pick channel pairs (1-2, 3-4, …) in the input menu and show a dual L/R meter in the mixer.
- 2Marker buttons – your predefined markers (⌘1-⌘9), active while recording.
- 3Arm – red = the track records and joins the program mix.
- 4Input menu – pick a channel on a physical interface, the DeckLink card's camera audio, or an NDI source's audio.
- 5Waveform – rolling live view; while recording the whole session is shown with markers.
- 6Elapsed timecode – the length of the recording (red while recording).
- 7Sync slate – a 1-frame white flash + tone on every track (key: M).
- 8REC – start/stop recording (⌘R).
- 9Time-of-day – the same clock as the timecode embedded in every file.
7. Audio mixer and monitoring.
The mixer controls the reference mix in the program file and the monitoring – your ISO tracks are always clean and untouched by fader/mute.
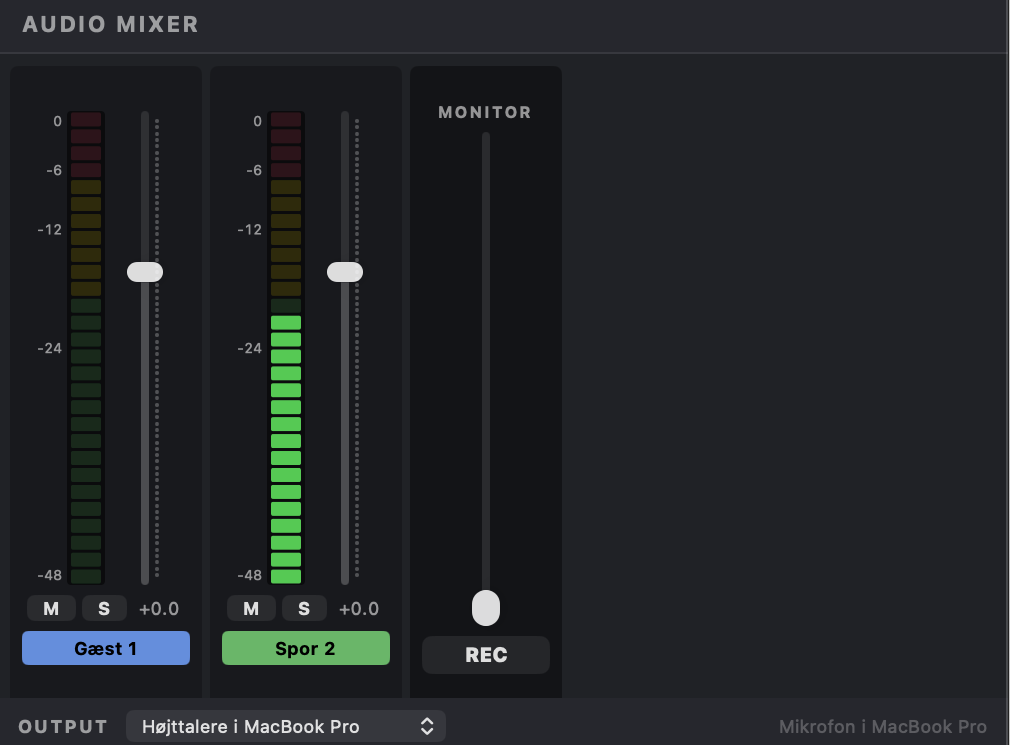 123456
- 1dB meter – logarithmic broadcast scale (-48 to 0) with green/yellow/red zones. Stereo tracks show two columns (L/R).
- 2Fader – gain in the program mix (-24 to +12 dB). Never touches the ISO file.
- 3M / S / gain – mute, solo (solo overrides mute on all other tracks) and the current gain value. Active buttons fill fully in broadcast style, and a yellow SOLO flag next to the cut/fade selector warns while any track is soloed.
- 4Name chip – the track's name in its identity color (change color via right-click on the track).
- 5MONITOR – producer listening of the program mix on any output with its own volume.
- 6OUTPUT – pick the monitor output. Use headphones – speakers will feed back into the microphones.
8. Recording, markers and sync.
One record command (⌘R or the red button) starts everything on the same time reference: an ISO file per armed camera, a WAV per armed audio track and the program file.
While recording
- Markers (⌘1-⌘9): Mark highlights, mistakes or cut points with a single keystroke. You define names and colors yourself in Settings → Markers. Every marker carries into Premiere, Resolve and Final Cut.
- Sync slate (M): Puts exactly one white frame on every video track and a one-frame 1 kHz tone on every audio track – a frame-accurate sync reference if you ever need to sync manually.
- Cut freely: Every cut is logged and the ISO files roll uninterrupted – you can always change your mind in post.
The status bar keeps watch
 123456
- 1Free space – while recording also the estimated remaining record time. Red when low.
- 2Dropped frames – should stay at 0. Yellow warning if not.
- 3CPU – the machine's total load.
- 4Network – traffic in/out in Mbit/s; handy for keeping an eye on NDI feeds.
- 5Audio status – armed tracks and active inputs/sample rate.
- 6DeckLink status – number of devices found and any driver problems.
9. Remote guests (PodcastPilot Call).
Guests join from a browser link on any phone or laptop and land in the app as a real source: their own ISO video, their own audio track, frame-locked to your cameras.
Invite a guest
- Open Add Source → Invite remote guest.
- Choose your options: green room (the guest joins with their track muted in your mixer until you open it) and auto-close (the room closes by itself after a period without guests).
- Click Create invite link and send the link to your guest. The 6-digit code with call.podcastpilot.app works too.
The guest opens the link, enters their name, picks camera and microphone and joins. Recommend headphones and good light, and on a phone: lay it down for landscape.
The guest in your production
- The guest appears as a source in the grid: cut to them like any camera. Their audio track is created automatically in the mixer.
- If the guest mutes their own camera or microphone, the source tile shows red badges so you can see it at a glance.
- Green room: the guest's track sits muted in your mixer until you unmute it, exactly like any other track. The guest sees a banner that their microphone is being held, and follows the program with sound and picture in the meantime.
- The guest automatically hears your whole program mix minus themselves, so there is no echo. If your hosts monitor through a physical mixer, use Remote guest output (Settings → Audio) to send the guests to a chosen output and channel pair, for example the RØDECaster's Chat device.
Recording and minutes
- The guest records with their own ISO video and WAV track on the same frame grid as your cameras. A guest joining mid-recording gets files from the moment they arrive.
- Call Manager (the phone button in the header) shows balance, usage and guest status, and can remove a guest from the call. A removed guest can rejoin with the code while the room is open, so end the call to close the room completely.
- Every license includes 60 guest minutes per month, pooled on your account. Usage counts per guest per started minute; an open room without guests costs nothing. Extra minute packs and the usage log live on your account page.
10. Playing back recordings.
Quality-check the recording right away – without opening an NLE.
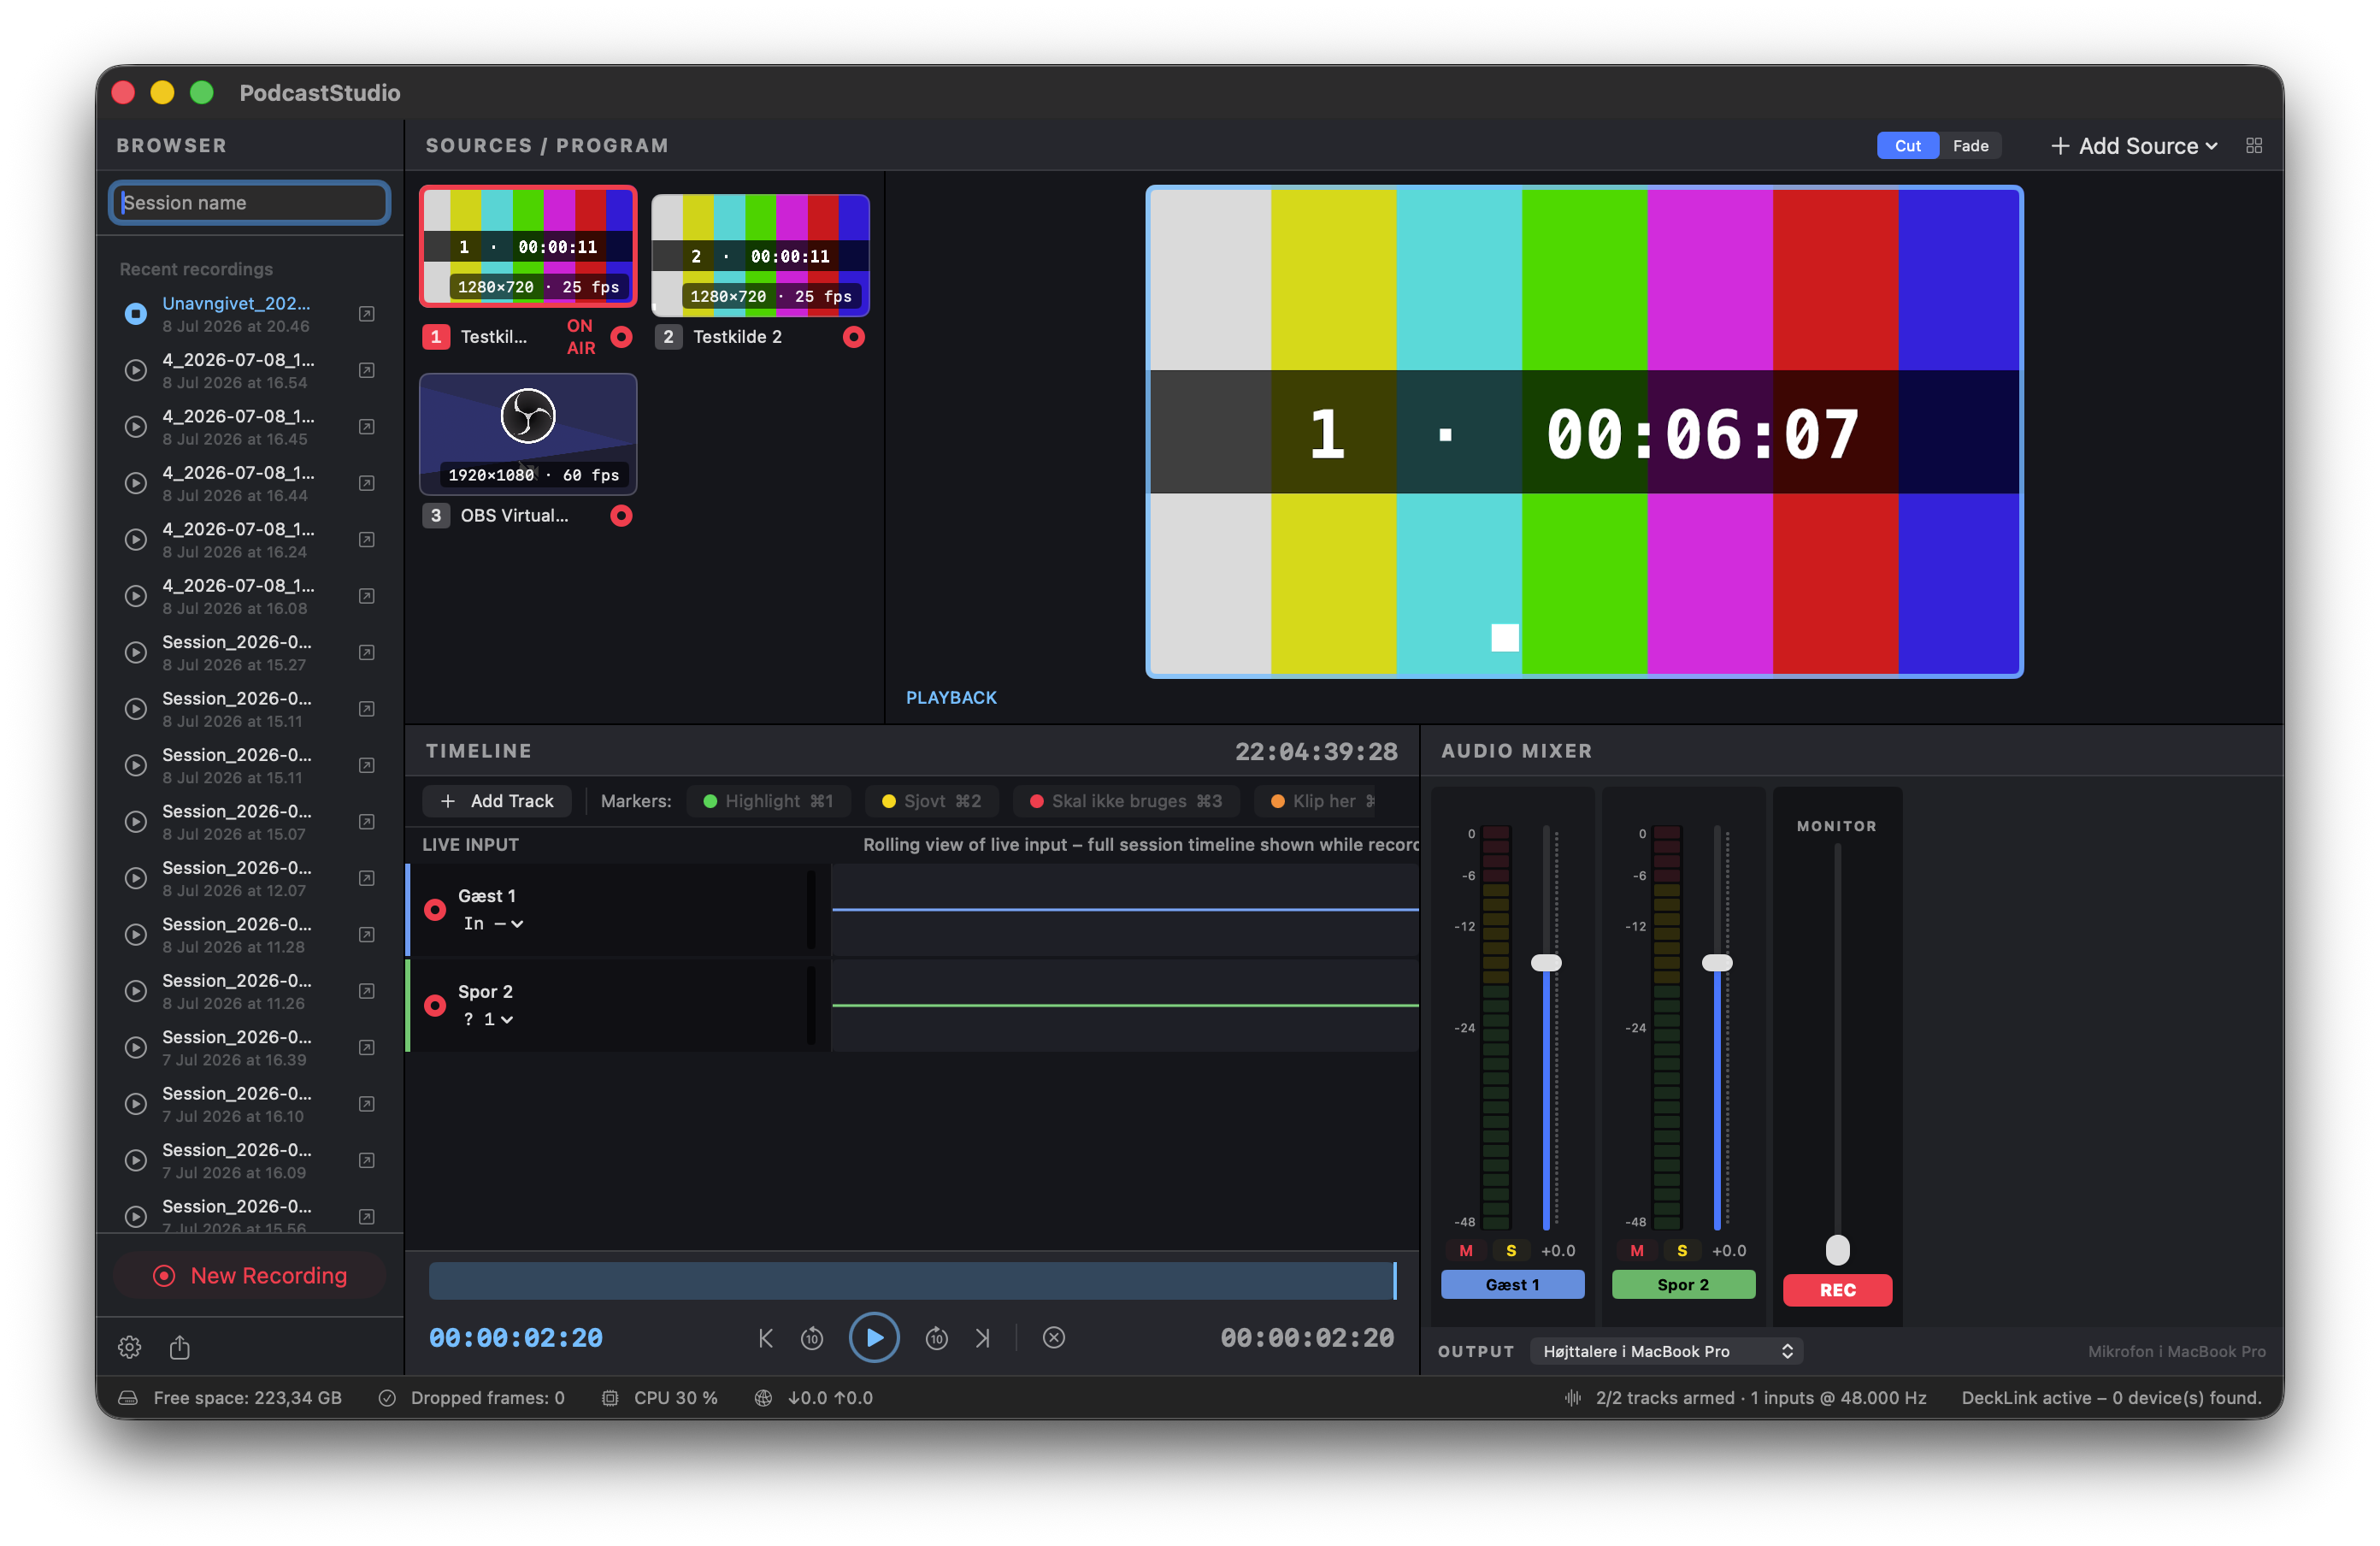 1234
1234
- 1Play a session – click the play icon (or double-click) in the BROWSER. The active session is highlighted in blue.
- 2Playback viewer – the program file plays with a blue border (blue = playback, red = live/recording).
- 3Scrubber – click/drag to seek; colored ticks are your markers, white ticks are sync points.
- 4Transport – jump between markers, ±10 seconds, play/pause and close (back to live).
If you start a recording, playback stops automatically – the live signal always wins.
11. After the recording: ready to edit.
Every recording sits in a complete session folder, organized like bins in your NLE – generated automatically the moment you stop.
- Video ISO/ – one file per camera, constant frame rate, timecode track
- Program/ – the switched program with a reference audio mix
- Audio ISO/ – 24-bit Broadcast Wave per track with BWF timecode
- Markers/ – the marker list as CSV and EDL
- Project files folder – the NLE projects: "(Premiere).xml" for Premiere Pro, "(Resolve).xml" for DaVinci Resolve (the two apps read stereo audio differently, so each gets its own file), "(FinalCut).fcpxml" opens directly in Final Cut Pro
- SESSION-INFO.txt – a human-readable summary of the whole recording
Your live cut as an editable timeline
The project XML contains two timelines: "– Cut" recreates your live switching as individual camera segments on the top track – including cross dissolves where you faded – with every camera's full ISO stacked in sync beneath it. A mis-timed cut is fixed by trimming or swapping a single segment, with the raw material right below. The second timeline has all cameras and the program stacked, ready for a cut from scratch.
How to import, per NLE
- Premiere Pro: File → Import → choose "(Premiere).xml". All timelines (stacked, Cut and the 9:16 social sequence) arrive in one go, organised in bins.
- DaVinci Resolve: File → Import → Timeline… → choose "(Resolve).xml". Stereo tracks arrive with both channels in the clip, but the XML format cannot mark the track itself as stereo — right-click the track head → Change Track Type To → Stereo. Resolve imports one timeline at a time — pick it in the "Import timeline" dropdown at the top of the dialog and repeat for more. The 9:16 social sequence also ships as its own file, "(Resolve SoMe 9-16).xml", with the fill zoom pre-applied.
- Final Cut Pro: File → Import → XML… → choose "(FinalCut).fcpxml". The event gets all three projects (stacked, Cut, 9:16).
Social clips included
If you set markers during the recording, the project XML also contains a pre-built vertical 9:16 sequence with a segment around every marker – the clips are pre-scaled to fill the vertical frame, so your editor only reframes and polishes for TikTok, Reels and Shorts.
12. Settings.
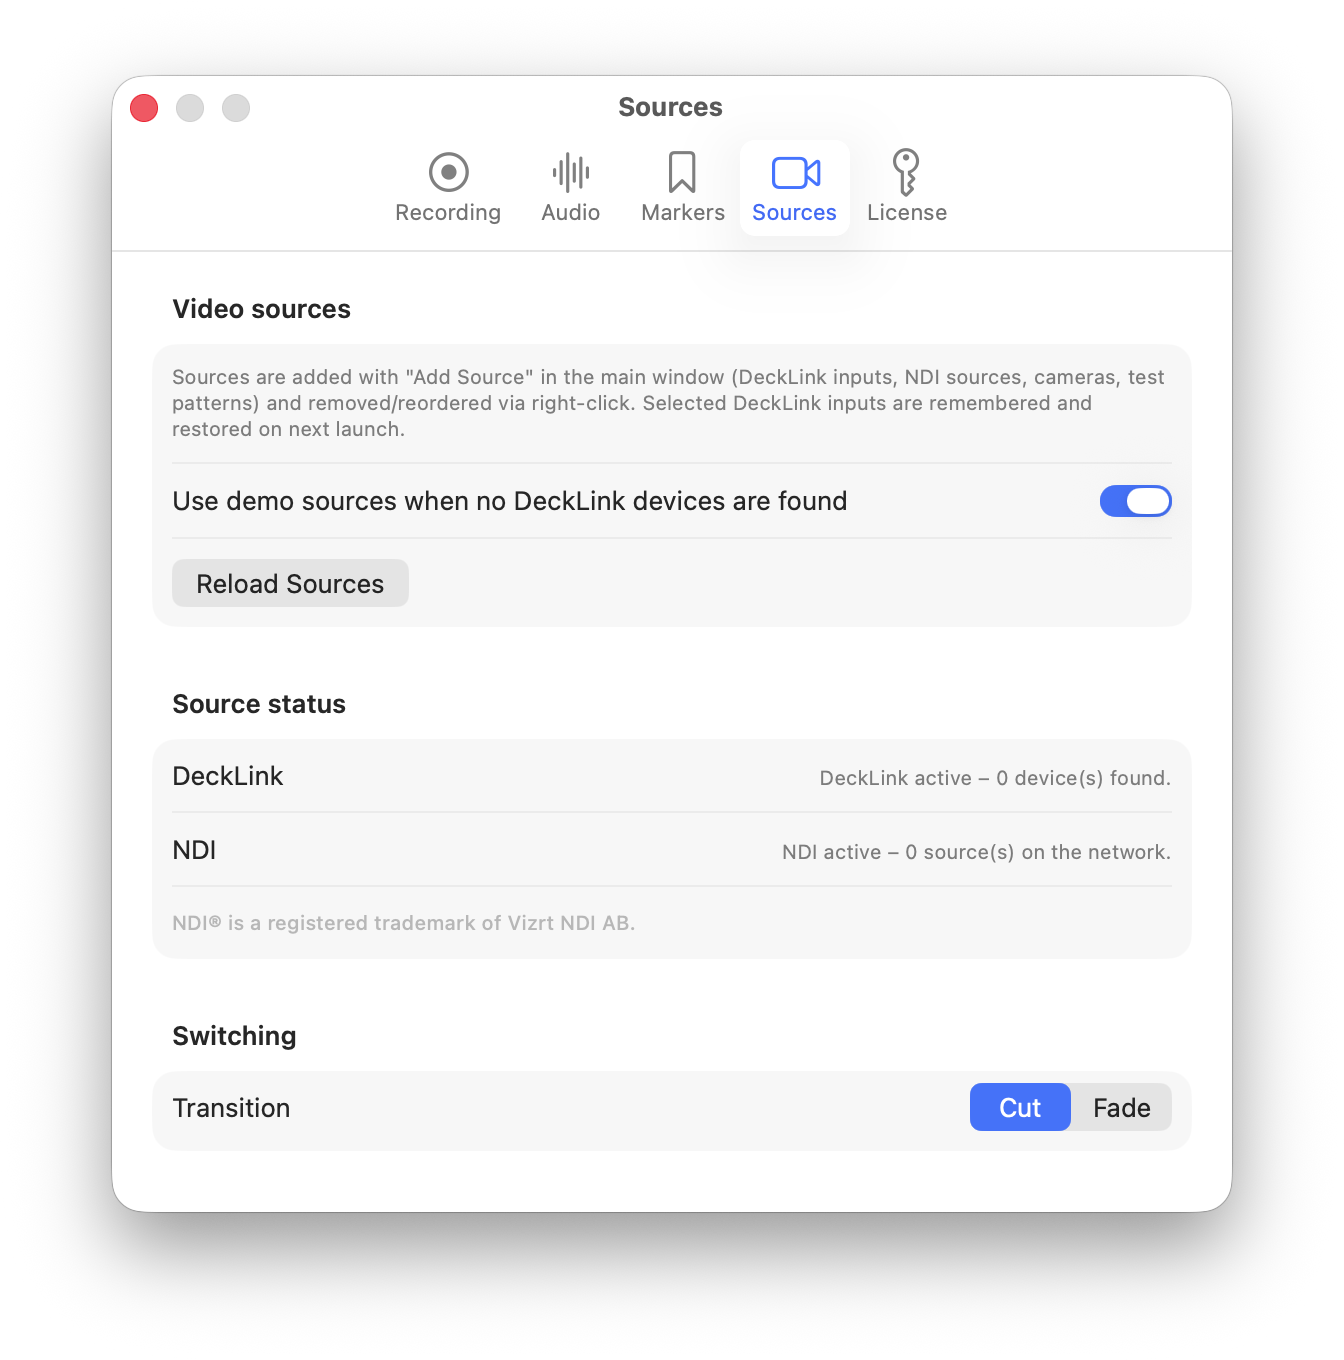
⌘, opens Settings with seven tabs: Recording, Audio, Markers, Sources, License, Support and Remote.
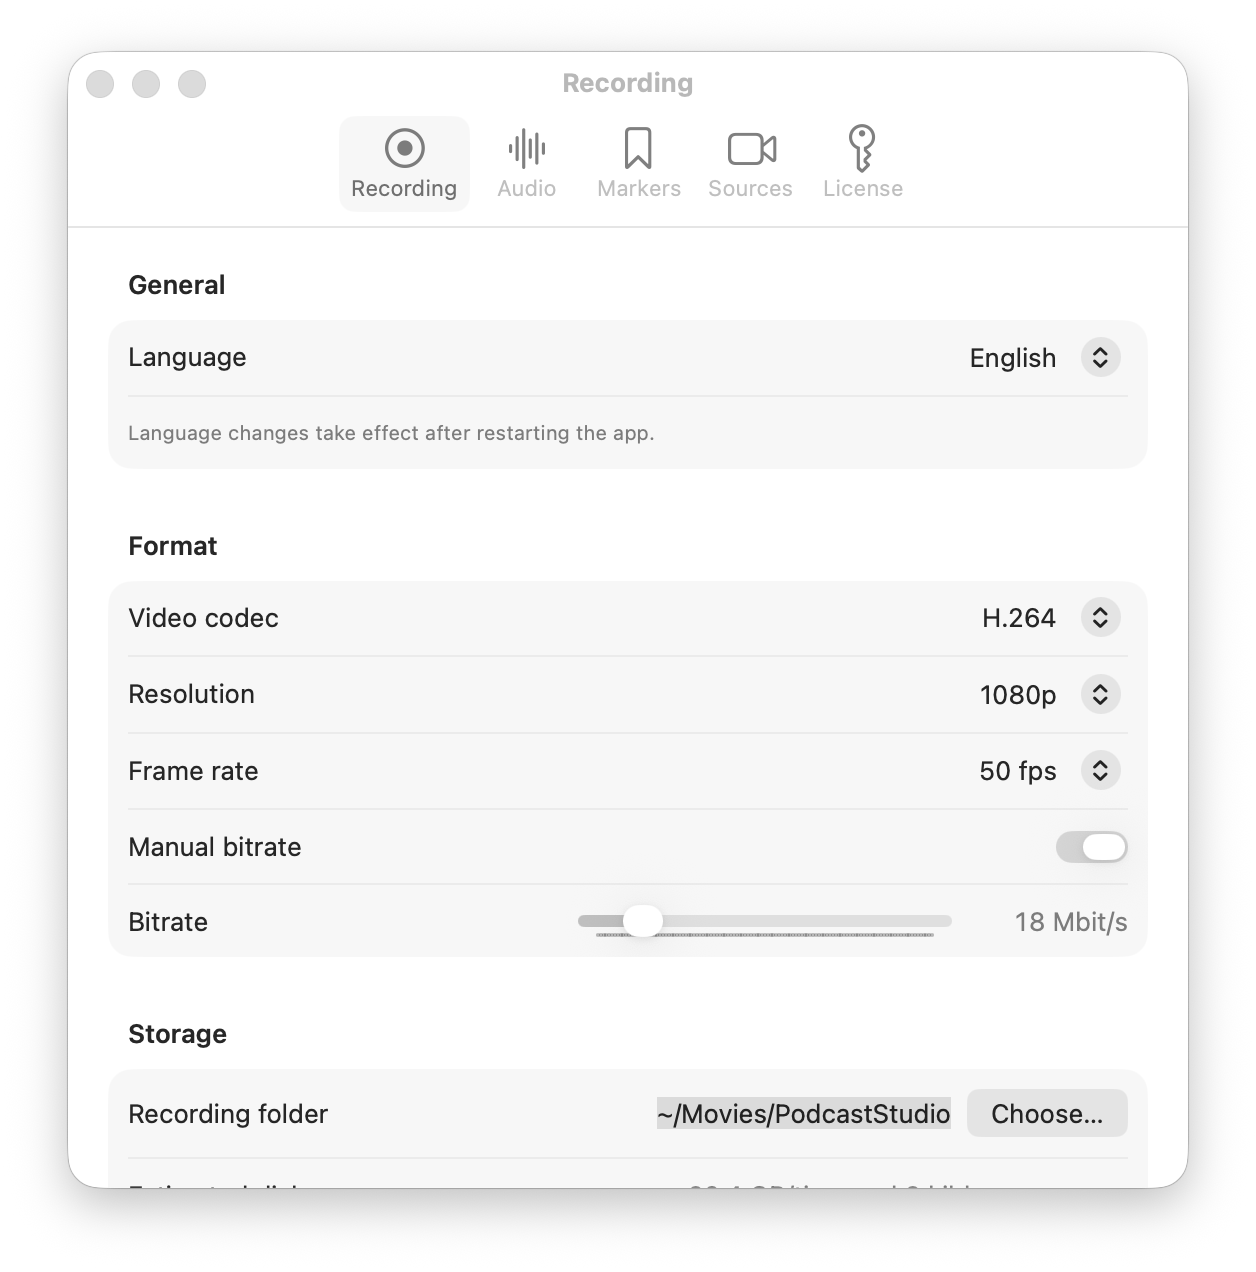
- Recording: Interface language, video codec (H.264 is the default — ProRes 422/LT/Proxy and HEVC are available), resolution and frame rate — Auto follows the source, a fixed choice applies to every file. For H.264/HEVC, pick the bitrate as simply Low / Medium / High (the resulting Mbit/s is shown), or choose Custom and type an exact kbit/s. Recording folder with estimated disk usage, measured disk speed and measured encoder speed (a warning before record start if the disk or the hardware encoder can't sustain the setup).
- Performance tip: Every recorded file (each ISO plus the program mix) runs through the Mac's hardware encoder. With many sources at 50 fps the H.264 encoder can hit its ceiling — on an Apple Silicon M4, four simultaneous 1080p50 H.264 streams are the practical limit. Recording five or more sources at 50 fps? Choose HEVC (a separate, much faster encoder — six 1080p50 streams with zero dropped frames on the same machine) or record at 25 fps.
- Audio: Device overview (the clock master is marked when several interfaces are active), audio engine restart and monitoring setup.
- Markers: Name and color the up-to-9 markers (⌘1-⌘9).
- Sources: Demo sources on/off, DeckLink and NDI status, transition (cut/fade) and fade duration.
- License: Activate a license key and see its status.
- Support: Collect a diagnostics package and upload it with one click — you get a short ID to quote in your email (see Troubleshooting).
- Remote: The control API for Stream Deck/Companion and other controllers — on by default for this Mac only; network access with a token is opt-in.
Presets — one setup per show
Recording several shows in the same studio? Save the entire setup — session name, recording settings, audio tracks with names and inputs, markers, switching and sources — as a preset via the Presets menu in the menu bar. Switch shows in one click, update a preset after changes, and export/import presets as files when you work in another studio.
Updates
PodcastPilot keeps itself up to date: the app checks for new versions automatically and installs them in place — no re-download needed. Check manually via PodcastPilot → Check for Updates… in the menu bar. The Help menu opens this guide.
13. Keyboard shortcuts.
| Shortcut | Function |
|---|---|
| 1 – 4 | Cut to source 1-4 |
| ⌘R | Start/stop recording |
| M | Sync slate (white frame + tone on every track) |
| ⌘1 – ⌘9 | Set marker 1-9 |
| V | Large multiviewer on/off |
| ⌘, | Settings |
14. Recommended hardware.
PodcastPilot runs on any Apple Silicon Mac with macOS 14+. This is the hardware we develop and test on ourselves — everything listed here is verified in daily use.
Mac
- Mac mini (M4) is our reference machine — quiet, affordable and drives a full multicam studio. Any M-series MacBook works for mobile rigs.
- Codec rule of thumb: a base M-series chip records 3 cameras + program at 1080p50 in H.264 — pick HEVC for more (6+ streams on an M4), or record at 25 fps. The app measures your Mac's encoder and warns you before recording.
- 16 GB RAM is plenty; recording writes to disk, not memory. Record to the internal SSD or a fast external NVMe drive.
SDI/HDMI capture: DeckLink
- Every Blackmagic DeckLink card supported by Desktop Video 16+ works. We test with the DeckLink Duo 2 (SDI). Pick by input count and connector: Mini Recorder (1 camera, HDMI/SDI), Duo 2 (4× SDI), Quad 2 (8× SDI) — or the Quad HDMI Recorder (4× HDMI) for cameras without SDI.
- DeckLink is a PCIe card, so Macs need a Thunderbolt enclosure: we test with Sonnet (Echo series). Any Thunderbolt 3/4 enclosure with an x4 PCIe slot works — check the card's physical length against the enclosure.
- No enclosure needed for NDI cameras — they arrive over the network.
Audio interface
- Every Core Audio interface works. We test with the Focusrite Scarlett series — one mic input per host/guest is the simple recipe (e.g. Scarlett 18i16 with four XLR inputs for up to four mics). Podcast consoles like the RØDECaster Pro II/Duo work great too: record each mic as a clean ISO and the console's processed mix as a stereo track — see the RØDECaster appendix for the channel map (remember to enable the console's multitrack USB mode).
- Several interfaces at once is fine: the app builds an aggregate device and syncs their clocks automatically.
15. Troubleshooting.
"Desktop Video is too old for capture"
DeckLink capture requires Desktop Video 16.0+. Get the latest version at blackmagicdesign.com/support, install and reboot.
No NDI sources in the menu
Check that the sender is running and on the same network, and that the NDI runtime is installed. Status is shown in Settings → Sources.
"The disk may be too slow"
The measured write speed cannot sustain the chosen quality × number of sources. Pick a faster disk (internal SSD/NVMe) or lower the quality (e.g. ProRes LT or H.264).
Dropped frames while recording
Check the status bar's CPU and disk numbers. Close heavy apps, and avoid recording to network drives or slow external disks.
"The audio system is not responding"
Right-click any audio track → "Restart Audio Engine" (also in Settings → Audio). A stuck video signal has the same escape hatch: right-click the source → "Reload Source". If that doesn't help, reboot the machine – it typically happens after a crash in another audio app.
The camera shows the wrong frame rate
The format chip on the source shows the detected frame rate. If it doesn't match, check the camera's output setting (e.g. 1080p50 vs. 1080i50).
Still stuck? Open Settings → Support in the app and click Collect & Upload: the app gathers logs, hardware info and recent session summaries (never your recordings) and gives you a short support ID. Quote the ID in your email to support – then we can see exactly what your setup saw.
16. Appendix: RØDECaster channel map.
The RØDECaster Pro II and Duo are popular front-ends for PodcastPilot. Here is how their USB multitrack channels map, so you can set up your tracks in one go.
Enable multitrack first
By default the RØDECaster presents itself as a plain stereo device. On the RØDECaster, go to Settings → Outputs → Multitrack → USB and deselect "Off". Connect the USB 1 port to your Mac (multitrack is not available on USB 2), and the device appears as "RØDECaster … Main Multitrack" with the full channel count. PodcastPilot picks it up automatically.
The channel layout (firmware 1.7.3 and newer)
Since firmware 1.7.3 the Pro II and Duo share the same layout, and it works differently from older firmware: the multitrack channels follow the fader order in the console's mixer, and every channel is delivered as a stereo pair. Mono sources such as microphones appear as "dual mono": the same signal on both channels of the pair. So microphone 1 is on channels 3 and 4 (identical), microphone 2 on 5 and 6, and so on. The device exposes 20 channels in total.
| 1–2 | Main mix L/R: the processed mix. Use a stereo track in PodcastPilot |
| 3–4 | Fader 1 (default: microphone 1). Mono track on channel 3 |
| 5–6 | Fader 2 (default: microphone 2). Mono track on channel 5 |
| 7–8 | Fader 3 (default: microphone 3 on the Pro II). Mono track on channel 7 |
| 9–10 | Fader 4 (default: microphone 4 on the Pro II). Mono track on channel 9 |
| 11–20 | Faders 5–9 in mixer order: Bluetooth, SMART pads, USB channels, wireless and headset. Genuine stereo sources (Bluetooth, SMART pads) use a stereo track on their pair |
The order follows your mixer: the table above assumes the default fader layout. If you have rearranged the faders on the console, the channel pairs follow your order: fader 1 is always 3–4, fader 2 always 5–6, and so on. The mixer view on the console is the authoritative map.
Older firmware and RØDE's own guide: before firmware 1.7.3 the layout was fixed at 16 channels with one mono channel per microphone (3–6 on the Pro II). RØDE's USB connections guide still shows that old layout, so do not be confused if the two disagree: the authoritative description of the current layout is RØDE's multitrack channel layout article. A quick check: if the Main Multitrack device shows 20 channels on your Mac, you have the new layout; 16 channels means the old one. Check your firmware version under Settings → System on the console.